Installing a Base for an AMSEC Safe
Article reproduced from Safe & Vault Technology Magazine, September/ October 2020 Issue
Elevating a base makes life easier for customers. Here’s how to do it.
I look at the Victorian pedestal safes of 150 years ago like the first generation of stand safes or safes with bases. The pedestal safes are quite beautiful and easy to use, as the height lets you use them without bending over or getting on your knees.
Modern-Day Solutions
These days, we still receive requests to get the safe up higher, and this is done in several ways. One way is to build a platform, which can be made of wood or, even better, poured concrete. Another way is a custom-built stand. The stand is usually open when installed, bolted down, then later covered with whatever the homeowner wants. Sometimes it’s just drywall. Drywall gives you some fire protection but not much to stop someone from busting through it and unbolting the safe. I prefer to see a layer of concrete board with tamper screws, then drywall or something else to make it pretty. But, sometimes a customer’s budget dictates simply drywall; I just make sure the customer makes that decision.
Another option is to order the safe with a base from the factory. The install I cover in this article is a factory-made base option on an AMSEC safe. The base option is not always available from the manufacturer, but most will make one for you when asked. It does take lead time, and that can influence the customer’s decision. Choose your safe manufacturers wisely, and partner with ones that work with you — not ones who say, “Here it is; take it or leave it.”
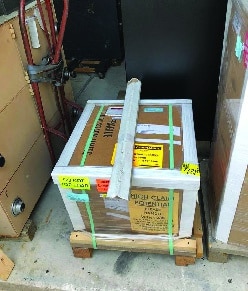
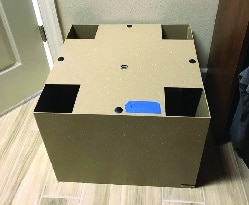
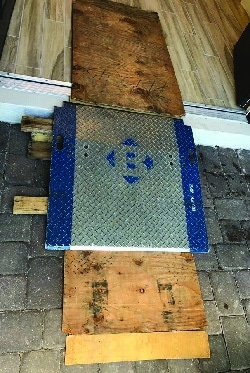
The Safe Pedestal Delivered 
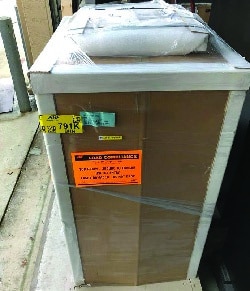
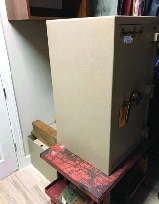
The Safe Body Was Delivered To The Authors Warehouse 
The pedestal is in place at the customer’s home. 
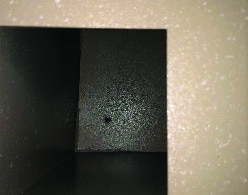
The Anchor Holes Are Visible In The Bottom Of The Pedestal
Choosing a Location
When deciding on a location for the safe installation, I like a spot against a solid wall or in a corner. But, again, the customer is paying the bill and makes the ultimate decision. Many times, the location is chosen because of visibility, lighting, accessibility and a host of other variables. I was taught that the first place a burglar will look in a residence is the master bedroom (sometimes that’s the only place). So should we locate the safe in a guest closet? People tend to be a bit lazy. If the safe is in a different room from the one the customer is dressing in, will it be used to store the jewelry, or will the jewelry be left on the dresser? Let the customer decide.
Why do I like the corner or solid wall? It makes it a little more difficult to remove. If you located the safe in the center of a room, it’s easier to start hitting it from all sides and work the anchors loose or fatigue the weakest point.

This Image Shows The Safe Being Transferred To The Elevating Table -
The Ramp For The Step Up Into The House Was About 6 Inches In Elevation
Installing the Base
So now that we have a location, we need to install the base unit. If it’s tile, wood or laminate, just drill through it with a good hammer drill. If it’s carpet, you need to cut it. Get a box cutter with a new blade and make the cutout a hair smaller than the base. That way, it will fit snugly and look good. Use a straight edge or — as I like to use — a drywall square. Hold it in place to make sure your cut is straight and square. I use different types of anchors for safe installs (and I could write an article on that alone), but here, we should use the anchors that are supplied with the base. If none came with it, pick your favorite. My install was on tile, so I just drilled though.

This Image Shows The Safe Being Transferred To The Pedestal 
Another View Of The Safe Transfer Before The Roller Bars Were Installed 
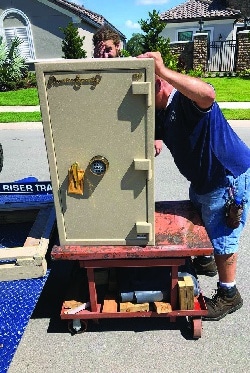
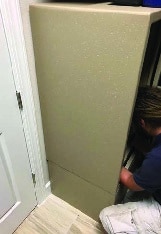
Dallas Is Bolting The Safe To The Pedestal
Placing the Safe
Now it’s time to put the safe on top of the installed base. There are many ways to do this. Old-school cribbing with a pallet jack would have worked and might have been a better option, but we usually use our elevating table. It goes from about 23″ from the floor to about 40″. Mine has a manual crank, but they make many kinds that do various weights. I think mine will do 2,000 pounds max. It’s a great tool on my safe trailer.
I could have loaded the safe unto the elevating table prior to the install at the warehouse, but I don’t really like to ride with it loaded that way. Instead, we use our trailer’s ability to rise and lower with a push of a button. We put the elevating table up to the back of trailer, then match the heights and use roller bars to move the safe to the elevating table.
We ran into a bit of trouble moving the safe from the table to the base. The table would not go that low. That is why cribbing may have been a better choice. Hindsight is always 20/20.
After getting everything lined up, level and square to the wall, it is time to bolt the safe to the base. Align the tapped hole in the base with the predrilled hole in the safe. Again, use the bolt supplied. Clean the safe and surrounding area, and you’re done. It looked good and worked great — another happy customer.

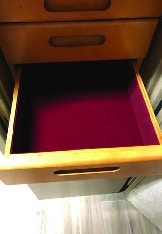
The Drawer Kit Is Reinstalled 
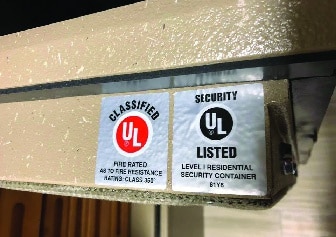
The Safes Labels Are Shown 
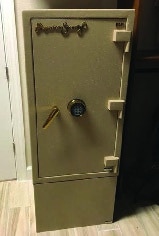
The Finished Product Is Shown It’s Secure And Easy To Use